Raspberry Pi – Teaching Electronics + Programming in Large Virtual Events Part 1
The Raspberry Pi Foundation was founded in 2009 to teach basic computer science. Inexpensive, standardized and versatile. If you are going to leverage them to teach electronics in a larger setting, especially virtual events, there are some best practices that will reduce friction, allow you to teach larger groups and also scale better. These apply both on the OS side as well as the components you might work with.
The Soft(ware) Side
There are several options for the operating system. Most people start their individual journey seeing NOOBS. NOOBS stands for New Out Of Box Software. It includes Raspberry Pi OS, but can load 8 other operating systems if you’ve got a network connection.
If you are guiding a larger group in real time, there really isn’t time to download and install a different operating system. Even if you are opting for Raspberry Pi OS, that should update so people have consistent versioning.
What I suggest is selecting an operating system. Install it, update it and add any needed software. You can then make an image of this. Shrink and compress the image, then have your participants download and get it on a MicroSD card prior to the first meeting. I’ll go into more details on this in a later post.
The Hard(ware) Side
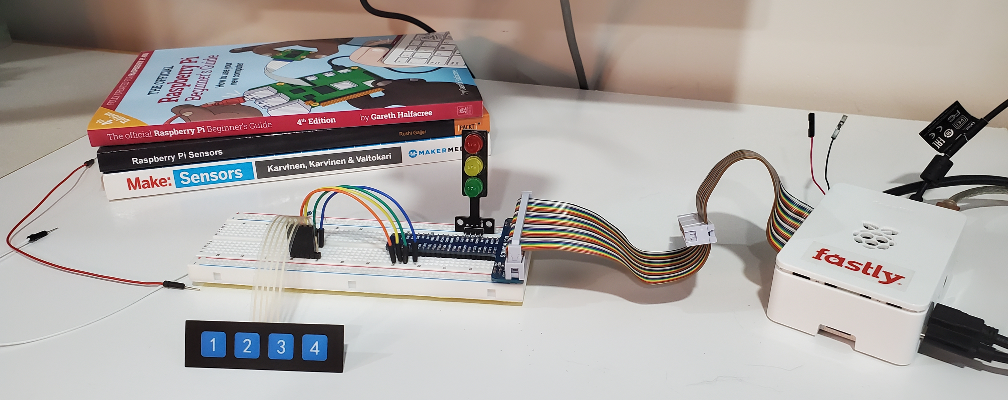
The GPIO header (connection) creates an extensive opportunity to learn computer science while also interacting with electronics. Participants get to see their code interact with the real world. A simple and inexpensive breadboard opens up a whole world of experiences. It also creates a lot of potential for hiccups and bumps in the road that can slow down the group. Selecting the correct components can make for better experience. More interactive and more learning that moves faster for a larger group.
Photo by Harrison Broadbent on Unsplash
The great part is that the GPIO header does both input and output. So you can have buttons and LEDS that interact with your programming. The buttons allow for input and the LEDs provide output. Having your code interact with the real world is very exciting.
Breadboards
For rapid prototyping. Often a commodity, quality and standards vary. The GPIO Adapter (below) that I ultimately selected comes with a breadboard. For that reason I just double check the ones that I purchase, but have a small quantity of Chanzon Breadboards on hand to swap out if needed. Donate the ones you can’t send out to your local high school’s science department if they have a need. I’ll drop my spares off at my son’s robotics club.
GPIO Adapters
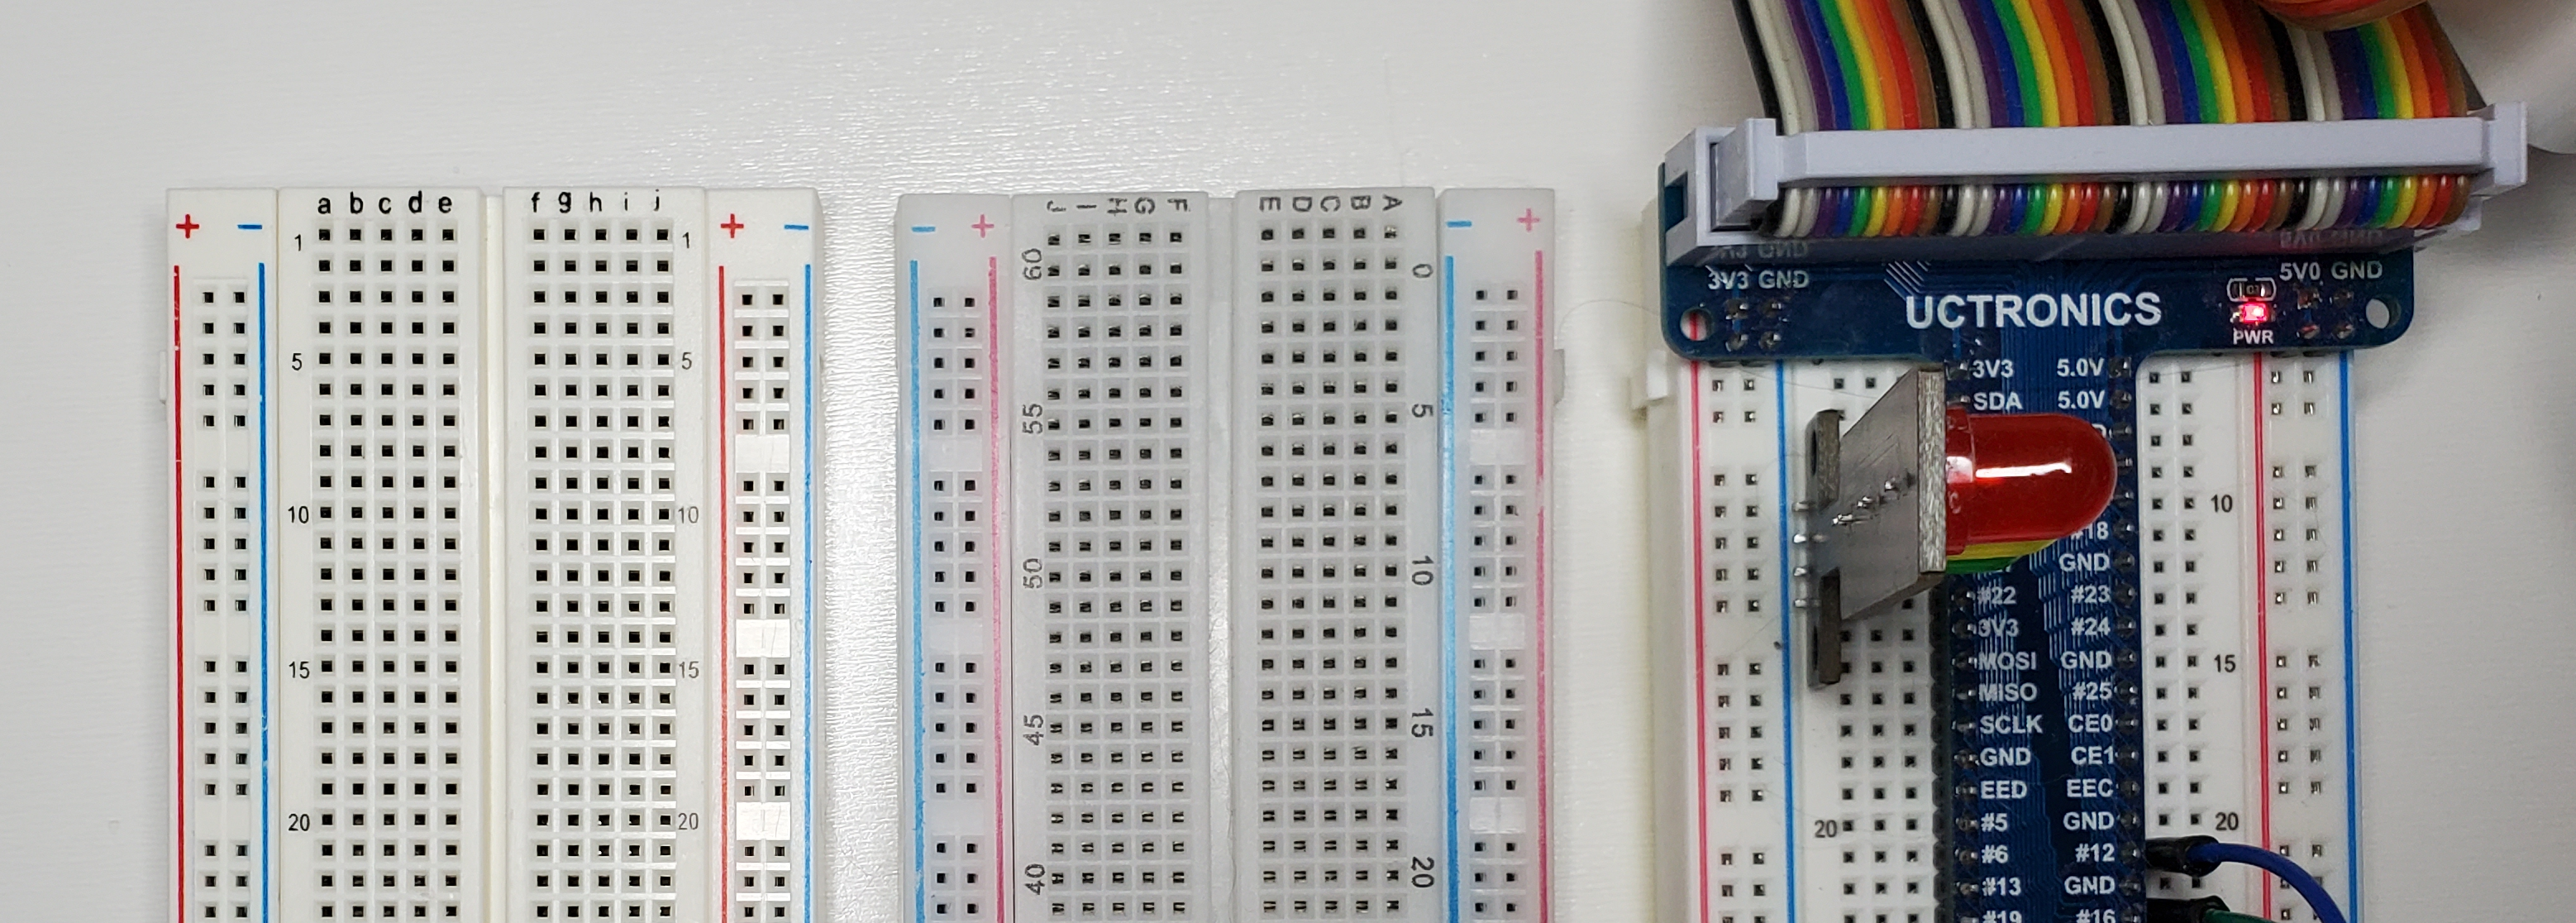
A large number of different GPIO adapters are available on the market. They use a 40 pin ribbon cable to connect the GPIO pins to a breadboard. I tried at least a half dozen different ones. Ultimately settled on the UCTRONICS GPIO Breakout Kit. They come with a set of jumper wires as well as the ribbon and breadboard. The key feature on the UCTRONICS one was that it had connections to get power to the rails on the breadboard.
The ones that didn’t make the grade lacked that feature. Several also had printing on them that was difficult to read or were too wide and used up too much space on the breadboard. The ad on Amazon does not mention Raspberry 4, but they’ve worked fine for me so far. I haven’t tested all of the pins, beyond basic GPIO, but I’ll update here if I discover different.
Of the 70+ kits that passed through my hands, I found the following:
- The first one I purchased had the positive and negative silk-screening reversed on the breadboard. Not acceptable to send out.
- Another 4 had the numbering different on the left than on the right. You need these to be consistent for everyone or your students/participants will get confused. Basically 10% I wouldn’t send out if I wanted the event or class to go smoothly.
- One review said that their (SOMETHING) rails didn’t run the entire length of the board. I tested all of the ones I sent out to be sure they were consistent. If you aren’t able to do this, make sure anyone helping to troubleshoot issues is aware of this being the potential issue.
I recommend assembling the adapter into the breadboard and attaching the ribbon cable before sending it out. The 44 pins have to be inserted straight and far enough. It also helps because you can set them all up the same – so that the pins start at pin 6 for example.
By assembling the ribbon cable in advance you also make sure the correct end is being attached to the Raspberry Pi itself.
LEDs
With LEDs you can get them in bulk quite inexpensively as well as resistors. This methodology saves costs and gives more hands on opportunity. But if you are working on a tight schedule I highly suggest the TeOhk 5MM 5V Mini Traffic Light. They’ve got the resistors built in and also in a pinch there are a couple of spots you can plug it in right next to the GPIO adapter and not have to run any wires. This saved me in one presentation where the assembly took longer than I had expected.
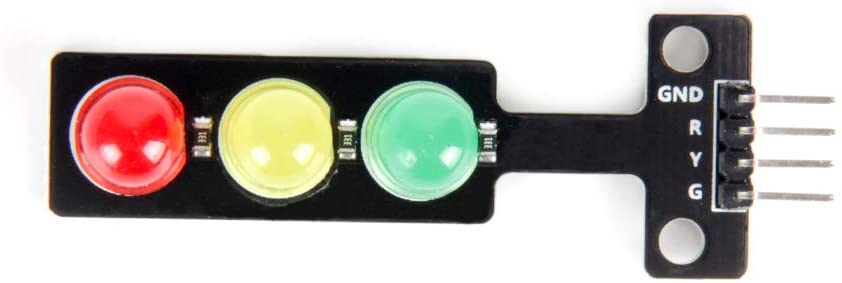
The tradeoff with these are the cost compared to individual components, and also that I’ve had 1 out of 70 show up with one LED bad. Also that if one light goes bad, the whole assembly isn’t as useful unless you want to repair it yourself. At around $2 each I’d suggest just sending 1 more than your students or attendees need.
Switches & Buttons
There are lots of options here. I started initially tested 6x6mm push button switches. These were very simple to understand the wiring on, but also very small to handle and utilize. They also would be hard to ship without risk of the pins getting bent.
I also tried some 12x12mm push button switches that had colored caps. These had to be inserted in a certain way for the breadboard. The wiring also was not clear until I broke out a continuity tester. Also another one that would not be simple to ship. I ultimately used the foam from the GPIO adapter and a bit of masking tape to keep them in place.

A wise upgrade is the Adafruit Membrane 1×4 Keypad + Extras. I also suggest including a 470ohm resistor with each one of these. If someone configures their GPIO settings wrong they can damage their Raspberry Pi board. Also, the wiring does not make logical sense so be sure to test and diagram prior to your event.
Of the 60+ of these that have passed through my hands, I believe 1 arrived bad where one button didn’t work. At $7 each you’ll have to decide if you want to send a spare or have some other plan to handle that situation.
Timing
Several of these components weren’t always available in the quantities I needed. For one event where the numbers change 3 times during planning it took 12 different orders to secure the number of GPIO adapters that I needed. Start early and order extra. You’ll be glad you did.
Presentation
We included a plastic box from Home Depot with each kit as a nice way to organize the parts. Many of the boxes from the CanaKit wouldn’t fit in there, but once the system is assembled, it and the power supply fit quite nicely with the other parts.
This case is a great opportunity to brand with your logo if you desire. There also is an opportunity to create a document to attach inside the lid with details like the GPIO pinouts or a guide to the color patterns on resistors.
I also purchase small resealable bags from Office Depot or the local Jo-Ann Store to organize and package the items. Another item that you might also just source on Amazon.
Preload the event!
I mentioned prebuilding the GPIO adapter prior to sending it out. This saves time and insures that everyone has the same pin numbering. There are other things you can do, like cutting the zip tie on the wire connector bundle. Not everyone will have scissors handy, plus a bad cut could ruin several of the thin wires.
It also would be wise to record a video on assembling the Raspberry Pi. Put it on Vimeo and include the 3D barcode to it in the kit. Have people assemble and boot the system before the class or event.
Half Done!
For Part 2 I’ll cover details on the actual Raspberry Pi system and what components to order. If you’ve got questions or comments so far – let me know!