Raspberry Pi – Teaching Electronics + Programming in Large Virtual Events Part 2
In Part 1 I covered a key overview of the additional items that can be used to do an interactive event where the participants get to work with both electronics and code on a Raspberry Pi. It needed to be firtst since there are so many options and many pitfalls. The next step, selecting the actual Raspberry Pi details is much easier. Since the Raspberry Pi itself is almost a commodity item, it is good to select a vendor that does more than just buy in bulk and ship individual components.

Early on I happened across CanaKit and after one purchase I knew I’d be hard pressed to switch vendors. Short on time and knowledge, we started off with their Raspberry Pi 4 Complete Starter Kit. The white case and red/white keyboard & mouse were perfect for our branding. And the CanaKit branding on the case was subtle enough as to not distract. There were components that weren’t needed, and we also purchased a few dozen of their CanaKit Raspberry Pi 4 PiSwitch (USB-C) to round out the package. CanaKit also includes a high quality quick start booklet as well as a GPIO pin guide. Their components feel high quality and the packaging is crisp.
For the second event, Mike at CanaKit steered us toward their Custom Kit page. This allowed us to remove and add parts, basically tuning the kit to exactly what we needed at a discount over our original method. Going Custom can add a day or two delay to the order, but if you are doing a class or marketing event you should be planning weeks out anyways. I recommend standardizing on a package that you can keep using for a long period of time. If you are preparring for 35 people every time, there will times that you don’t fill the event. You want to be able to re-use those kits without having to keep track of what is in each one.

As you “Build your Custom CanaKit” the first item is to decide what level of Raspberry Pi system to include. The only difference is the memory on the system. Odds are that 2GB is enough for a basic experience. If you want to provide something that shows you are serious and also has a longer time being useful, I suggest going with at least 4GB. As of this writing, most OS distributions for the Raspberry Pi are 32bit. This means that they can only use approximately 3.5GB of that 4GB. If you know you’ll be doing future events with your attendees with the kits you’ve sent them, consider going with 8GB to future-proof what you are providing.

We didn’t add the MicroSD card since we were sending a prebuilt version of RaspberyPiOS that was updated, had our branding and included extra sfotware and libraries. It also had a few services enabled to make the event easier.

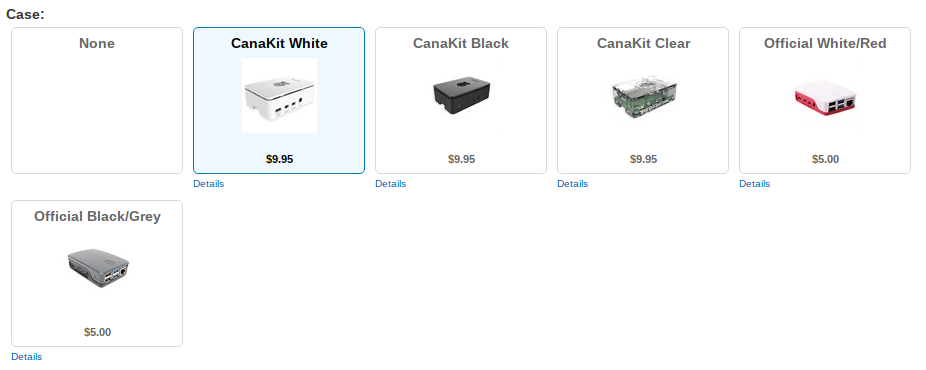
The Case decision should all be around your branding and what works best for how you’ll be cusomizing the package before shipping it out. We were fortunate that the white CanaKit case was perfect. The lid has space to allow the GPIO ribbon cable to exit when closed up. We did discuss going even more custom with CanaKit’s Aluminum Case, and might switch to that in the future. Note that as of this wriing you’d need to work direct with CanaKit to get this combination put together. Also be sure to test that the components you plan to use, such as the GPIO adapter and cable will work with the case you select.

For cooling, at a minimum I suggest adding the Heatsinks. We did the Heatsinks and the Fan even though we would initially be using the GPIO connections to a breadboard. We wanted to provide the attendees with something that would be useful and long lived if they decided to do something later without the GPIO adapter.

For power the best options is the CanaKit 3.5A + PiSwitch. The components from CanaKit seem to be high quality. And I find a lot of technical people don’t like plugging and unplugging the power on a device as a way of turning it on and off. Granted USB-C is much easier than MicroUSB, it still adds a higher level of quality to include the PiSwitch.

Include at least 1 MicroHDMI cable. Most people don’t have one in their home. You want to be sure they can hook the Raspberry Pi up to their TV or monitor. Another plus with the CanaKit one is that it is 6′ long. This is more conducive to events where the person needs a bit more distance and cable slack.

We did include the official red and white keyboard. This made sure everyone was able to quickly participate and not have to take the keyboard and mouse from another system. Again, the color scheme worked well for us.

The official Guide is up to you. It does add to the feel that you are sending a complete quality package.
Using the Custom Kit page reduced components that would be not used. It also simplified our inventory and ordering. I also brought the price down by almost 8%, always a benefit for large events!