Getting RAID Inside a Dell
Note: This article uses Affiliate Links. I’ll earn a small commission, at no cost to you, if you purchase items through those links. Since I’m using the items and found them worthwhile, I feel I am still in integrity with my goals by doing this.
Lately I’ve gotten into using Dell SFF (Small Form Factor) PCs for minor servers. Running Linux with only a few services and they barely break a sweat. Not to mention they are small, cheap, quiet and don’t generate much heat. It doesn’t take too much digging to find enough RAM to max them out for next to nothing too. That old Dual Opteron system of mine is tempting, having 16 cores and 196GB of RAM. I’ve quieted it down with some Nocturn fans, but the heat it generates (and power it consumes) makes in untenable for use 24/7. If I need more power, I’ll eventually look into upgrading the CPUs in these old Dells.
If you decide to use them for anything production related, the first problem is that the SFF Dells only have space for one 3.5″ drive. If it affects revenue or your reputation, you have to run RAID. For those that are not familiar, RAID stands for Redundant Array of Independent Disks. I used to think it was “Inexpensive” instead of “Independent.” It is a way of building in resilience into hardware if you go with the correct RAID configuration. (Hint, don’t use RAID 0.)
A quick search on Amazon and you can find brackets that will mount (2) 2.5″ drives into a single 3.5″ bay. I get a little nervous about air flow, but for these I’ll also be using SSDs, so that shouldn’t be an issue as the SSDs don’t get as hot. Power consumption being as low as it is and all.
I went with the 2Pack of 2×2.5HDD/SSD to 3.5 Metal (Black) Brackets (buy), but they also sell single units. I was very impressed with the number of power adapters, SATA cables and screws they include. Also a little screw driver! Even that they had both silver and black screws. Even though no one can see inside I tend to use matching parts wherever possible. Even the screws for a drive should all be identical. OCD I know, but it’s how I roll. Less than $10 per system to be able to set them up this way. And FWIW, those dual SSDs will consume less power than a 3.5″ with spinning platters. I took some measurements and found . . . not very scientific, but was good enough for me to justify the cost.
Later I’ll add a gallery with more images and the steps, but here is one part way deployed:

For some Dell SFF systems, you’ll run into another issue. They only have two SATA ports. I plan to use the CD-ROM to do regular backups, since I’ve got a large quantity of writable CDs from a past business project. This is where adding a PCI SATA card does the trick. I used ELUTENG PCIE SATA Expansion Card 2 Port PCIE to SATA Card (buy). and it was supported by the distro of Linux I run. You’ll want to find one with half-height brackets that is supported by your operation system.
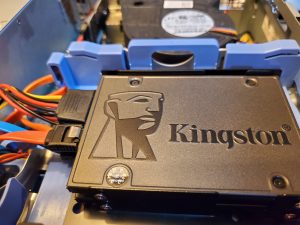
For the drives? I’ve always had good luck with Kingston and went with their 240GB A400 SATA 3 2.5″ Internal SSDs (buy).
At some point I need to do an article on ways to update your Linux install to not burn out SSDs. Sign up for updates to not miss out when that one gets published.