6 Tips for Big Screen Real Estate on a Budget
It has been decades since I started using Xinerama to get multiple screens on my workstation. This was a big part of my effectiveness as an architect and full stack development at Garage City. One screen for my IDE (Integrated Development Environment), one for the log outputs and a third to try out features in a web browser. The latest trend are 40+” wide monitors, and a 49″ Dell will set you back $1,279 as of December 2022. I learned early on that “the right tool is half of the job.” That being said it is important at the same time to be frugal with your spending.

Rather than spending large amounts on bleeding edge displays, you can get more desktop area with specialty video cards and inexpensive displays. This is especially useful if your work doesn’t depend on high resolution and color depth.
1. Learn the Tech at a High Level
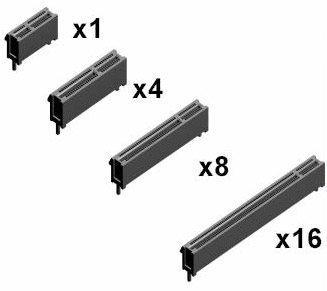
Learn about what types of interfaces your computer has. The video cards will be some form of PCIe, and the number of open ports and their configuration varies from motherboard to motherboard. Pay attention to how they are laid out. Does that PCIe x16 slot sit so close to the next port that a fancier card will cover the other slot?

If you are not familiar with the connection types for monitors, get familiar with VGA, DVI and HDMI ports. Note that DVI is becoming less and less common and that there are several different kinds as it relates to pin density and capabilities. And on the HDMI side, there are actually 5 different kinds. You’ll probably only run into 1 or 2, but you need to be prepared.
And get familiar with which ones can be adapted with different cables and how expensive those cables are!
2. Plan for Versatility
As you use your system you will find out over time what works best for you. For this reason your layout might change. With this in mind I suggest when you do buy inexpensive monitors buy ones that have multiple inputs.
If you can, pick monitors are very similar in size and identical in resolution. I also suggest selecting monitors that have VESA mounts on the back. The standard stands are too low for comfortable work. I’ve been picking up monitor stands and arms used for $20 to $25 each on Craigslist. Of course with the pandemic going on they aren’t as convenient to find and pick up. If you are having to fabricate adapter plates, I’ve found that the screws in the back of the monitors tend to be M4-0.7. Often 10mm in length, so I’ve gone with the 16mm ones with the 1/4″ wood adapter I’m using.
I started my setup with Samsung C24F monitors. There are quite a few models and what I’d looked for initially was 24″, capable of 1920×1080 with VGA and HDMI ports. All of the C24F models appear to do this. The curved models lend themselves better to when you have more than 1, and I was able to find display models on sale as low as $100 at places like Office Depot. Unfortunately Samsung has gotten out of the monitor business, but search Craigslist and standardize on what you find to be common. On a tangent, I have sourced older 24″ screens by Samsung for as low as $65 on Craigslist.
3. Be Smart on the Video Card(s) & Cables
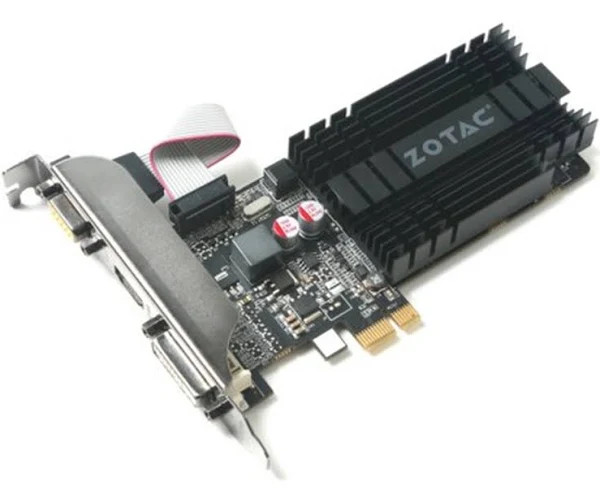
There are PCIe cards that can control 4 displays. Many that I have seen take up two slots worth of width in your computer case. They also consume more power which creates more heat. Plus some of the motherboards with the PCIe x16 slots are right next to each other. For that reason combined with using older monitors I’ve found that the Zotac GT 710 cards that go in a PCIe x2 slot are great for older motherboards. I picked up 3 of these new at $55 each. Even in December of 2022 Amazon has them for $70. Part of my frugality has been to utilize older dual Opteron boards where the RAM is extremely cheap. Makes for a great workstation and eventually another article.

Label your Cables or go with colors! When you move things around, or set things up, it can be challenging to sort out 4 or 6 cables that all come to the back of your computer. If you are using HDMI cables, they sell them in sets that are pre-colored. If your computer is up on your desk in the middle, you can probably use 6′ cables. I’ve found that for my setup (under the desk) it would have been better to go 10′. With the VGA cables, I use a labeler on them and then wrap the label with tape. My system is a current blend of colored HDMI and labeled VGA cables.
5. Don’t Forget the Camera . . . and the Lights!
Keep in mind where your camera will be. You want it to look like you are making eye contact as often as possible and still be able to see the other person’s face on the video call.
Don’t forget lighting. I’ll add a link here for my article on lighting once it is published. You will want your monitors arranged in such a way that you can get your lighting configured for great video calls as well as being able to reduce eyestrain and work.
6. Start Simple and Grow
My initial design had the monitors configured two high – one above the other. I found that this wasn’t as ergonomic as having them side by side. Plus the taller monitor stands were harder to find used. With my current setup I’ve evolved where I’ll be working on one project to one side and the middle. The other side is reserved for communication when I choose to have Slack and Email up. These apps get silenced and minimized when I am in focus mode.
In Summary
No argument, you want the best tools when you work. But there is something to be said for frugality. By shopping around and leveraging the right tech you can get way more bang for the buck. I’ve got perhaps $600 into my 5 monitors, $250 into cables and cards and another $100 into stands. This wasn’t a single large expenditure either, and one of the stands is being used for my lighting.
With this setup I basically have 9600×920 of desktop that spans 90″ of linear screen width. Yes – that is more than 7′. Remember that the 40″ number for a single monitor is a diagonal measurement. Those monitors are actually not actually that wide. I have ample room to have multiple documents open, be coding and testing in a web browser while also being able to see logs scroll. That $950 has brought way more value than if I had spent the same on a single 40″ monitor.
If you’ve leveraged this article, or have already built something similar – send me a photo!
Editors Note: Please read the disclaimer for this blog as well as the part about it being a living document.