How to Include a Raspberry Pi in a Remote Demo – Part 1
Raspberry Pi single board computers have been around for more than 8 years now. They are great for IoT (Internet of Things), learning about InfoSec (Information Security), as a portable/inexpensive development environment or working into events to teach programming or electronics. When the time comes to do a virtual course or demo, how do you work them into that Zoom or other virtual meeting? There are a few steps that can help you integrate one dependably in a way the attendees can clearly see and learn from.
One of the key items is to turn on VNC. VNC stands for Virtual Network Computing. The RaspberryPi OS already comes with the service installed. Just jump into Preferences > Raspberry Pi Configuration. From there, click on Interfaces and Enable the third option “VNC:”. You’ll also need to install the VNC Client on the system you are running your course, demo or presentation from. It also doesn’t hurt to give your RaspberryPi a static IP address. Reduces the risk of a DHCP lease expiring and you not being able to connect last minute. (Nnap is your friend if this happens!)
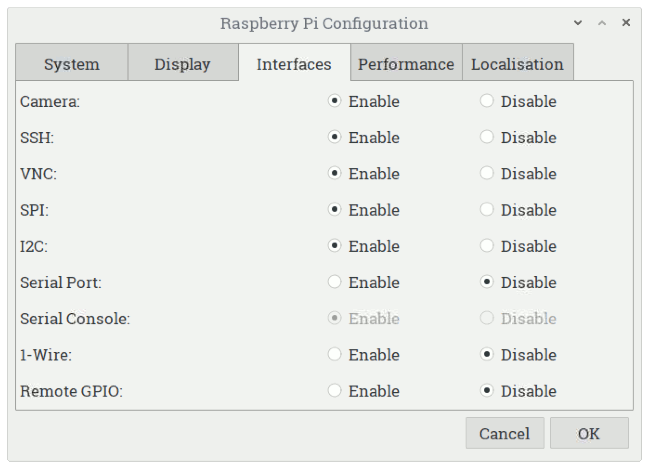
Now this gets over the easy hurdle of sharing using applications or doing dev work on the system. But what if you are working with the GPIO ports and want to show a breadboard and the wiring? Even perhaps bounce into a terminal window and show code or code running at the same time? Very simple to do – all you need is a USB webcam.
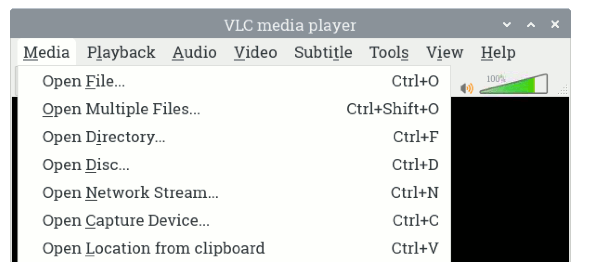
RaspberryPi Os comes with VLC installed by default, and one of the Just go into Sound & Video > VLC Media Player. Under “Media” you will see an option of “Open Capture Device”. Click that or press Ctrl+C. I’ve got a very inexpensive Microsoft cam on a simple mounting about 10″ above my system.
When you select this, you’ll need to select the Device Selection. For mine, since I don’t have anything else hooked up the Video device name was the first one – /dev/video0. Once I selected that, the only option for Audio device name was hw:2,0. But I currently don’t use the microphone on the webcam.
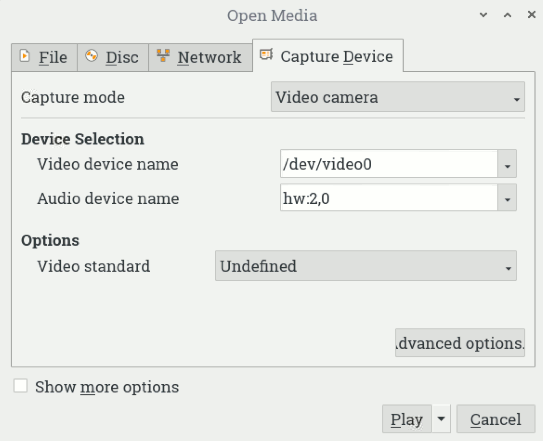
I did not make any changes under Video standard or Advanced options. Just press “Play” and you should see the camera view show up in VLC.
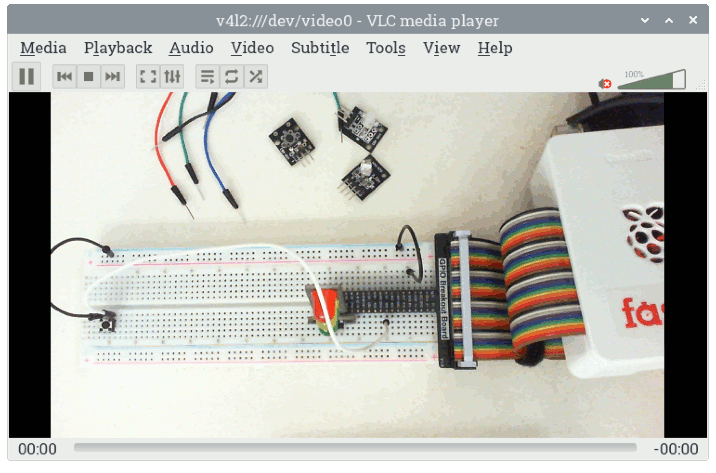
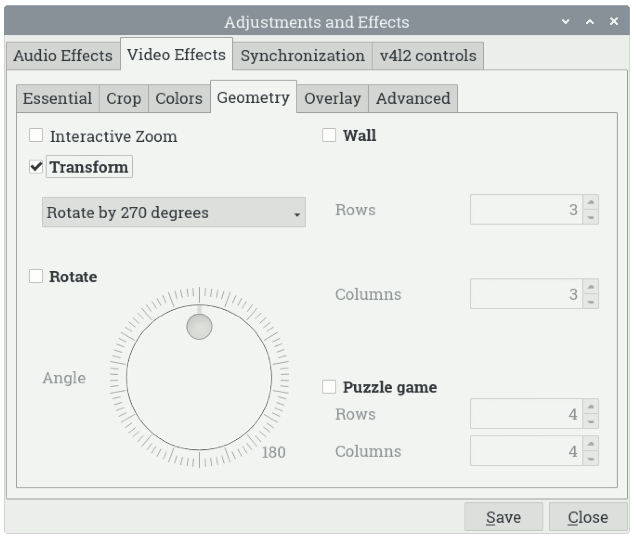
One trick that I did do was rotate the image. This allows me to fit the camera view and a terminal or web browser window on the same screen. To do this, click Tools > Effects and Filters or press Ctrl+E. Click into Video Effects and select the Geometry tab. Check the Transform check box and either rotate 90 degrees or 270 degrees depending on what allows you to interact with the system the best during your presentation. Save your settings, and you’re set! Now you can have a terminal window, the camera view and even a web browser visible on your desktop to share.
Here we can see the VLC view of the Pi, a terminal window and a web browser all handy to toggle between.
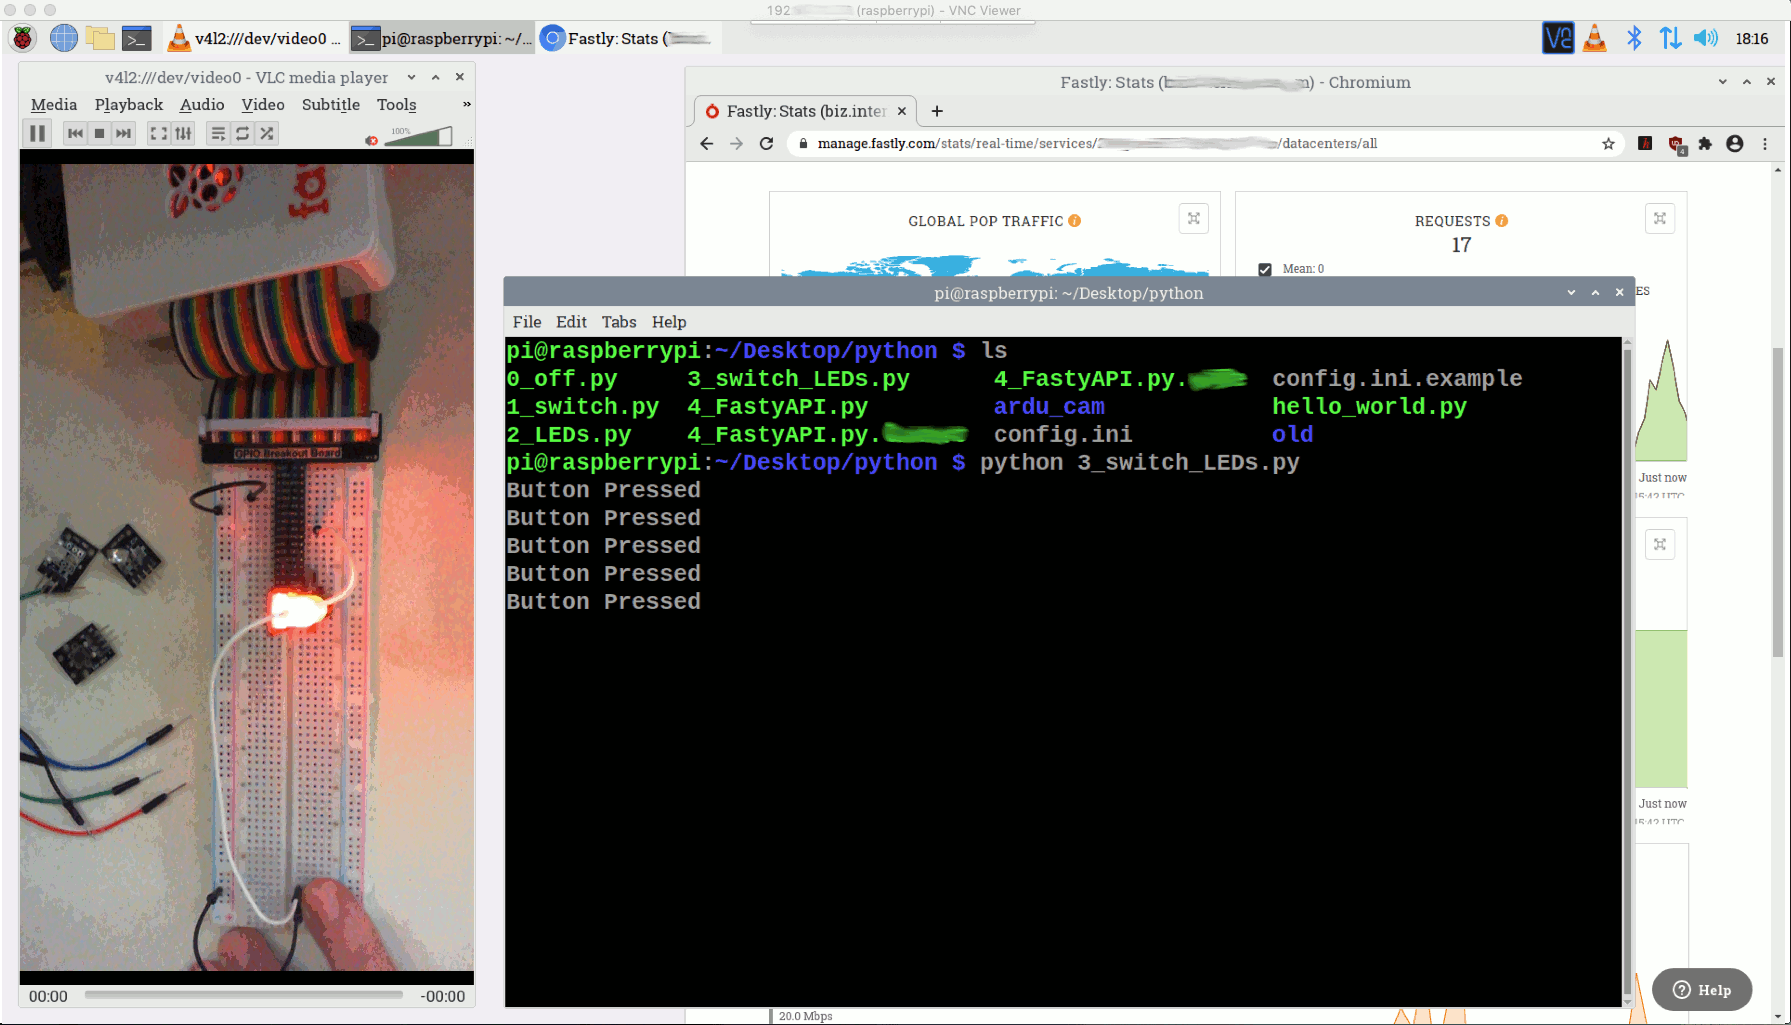
It’s that easy! If you need to show slides, just share the desktop with the VNC client. Use Google Slides and present in a web browser window your main system. You can tab back and forth, even have the sliide overlap the right 2/3rds of the screen while the VNC desktop has the other 3rd with the VLC view. Clear, consistent and easy.